Preserving That Fall Harvest – Part 2

veggiesThis was a great article from About.com.  These tips can prolong the great vegetables you may have grown or selected from your favorite farm stand.  Many vegetables will keep for months in cold storage, if you can provide the right conditions. Choose your vegetables well, keep an eye on them through out the winter and don’t be shy about using them. They won’t last forever.

General Storage Rules

Store only fully mature vegetables. Immature fruits and vegetables will rot quickly. Hold off harvesting as long as possible, especially with root vegetables, that can withstand some frost.

Do not store vegetables that have been bruised or nicked or that show the slightest sign of rot. Be careful when handling them.

Remove all excess soil. Don’t wash the vegetables, just let them dry and brush off the soil. You can wash them well before using them.

Thoroughly clean your storage area before each use.

Keep the storage area dark.

Do not expose stored vegetables to temperatures below freezing.

Check on your stored vegetables every week or two. Storage times are just approximations, since vegetables, temperatures and conditions can vary widely.

Use vegetables taken from cold storage as soon as possible. They will not last as long as they would if they had been freshly picked.

Dry vegetables (winter squash, pumpkins, onions, garlic) require less effort to store, but they need more space. Since indoor humidity is generally low during the winter, make use of any unused, dark spaces and corners. These vegetables store best if they are kept up off the floor and are not allowed to touch each other. If you must pile things on top of each other, you will need to check them more frequently.

Moist vegetables (potatoes, root crops, cabbages) should be stored in a container, rather than exposed to air. Traditional methods include storing them in peat, sand, sawdust or newspaper, but you can also use plastic bags or cardboard. If you choose to use plastic, make sure there are a few holes, for excess moisture to escape. To contain the odor of stored cabbages, you can wrap them in a couple of sheets of newspaper first.

An easy way to store these is to fill a cardboard box with about 4 in. of sawdust or other insulating material. Lay a single layer of vegetables on top of that. Do not let the vegetables overlap and keep them about 4 in. from the sides of the box. Add another 2 –3 in. layer of insulating material and another layer of vegetables. Continue layering until the box is almost full. Finish with a 4 in. layer of insulation. If you are worried the temperature will get too cold in your storage area, increase the top, bottom and side insulation to 6 – 8 in. or slip the first box into a larger box, with additional insulation. Since these boxes can be large, using a light insulating material will make them easier to lift and move around.

Root vegetables can be prone to shriveling. Storing them in slightly damp sphagnum moss or plastic bags with a few holes punched in them will help hold in moisture.

You can keep carrots and parsnips in the ground all winter, but you won’t be able to harvest them once the ground freezes.

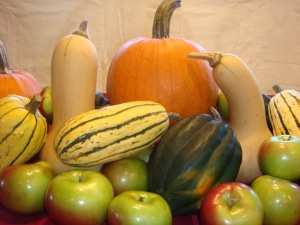
Winter Squash and Pumpkins – Make sure these are fully ripened, with a rind hard enough to resist being dented with your nail. Leave a couple of inches of stem intact and do not use it as a handle, or you could injure the squash. Allow to cure in a warm, dry, well ventilated spot for about 10 – 14 days, then store in a cool, dark, dry spot where you can spread them out and keep them separate. (Note: acorn squash stores better if not cured before hand.)

For the full article by gardening expert Marie Iannotti, visit http://gardening.about.com/od/vegetable1/a/Storing-Vegetables-For-Winter.htm.

Preserving That Fall Harvest – Part 1

During the fall season, harvesting crops and preserving them is top of mind for many. There are many methods for preserving, but one of the easiest is freezing.  While freezing is not best for ever type of produce, freezing is an excellent way to preserve vegetables, is easy, and only requires a freezer that maintains a temperature of 0 degrees F or lower.

Blanching

Blanching (scalding vegetables in boiling water for a short time) is a must for almost all vegetables to be frozen. It stops enzyme actions which can cause loss of flavor, color and texture.

Blanching cleans the surface from dirt and organisms, brightens the color and prevents loss of vitamins. It softens vegetables and makes them easier to pack. Blanching time is crucial and varies with the vegetable and size. Under blanching stimulates the activity of enzymes and is worse than no blanching. Over blanching causes loss of flavor, color, vitamins and minerals.

For home freezing, the most satisfactory way to heat all vegetables is in boiling water. Use a blancher which has a blanching basket and cover, or fit a wire basket or large strainer into a large pot with a lid. Use one gallon water per pound of prepared vegetables. Put the vegetable in a blanching basket and lower into vigorously boiling water. Place a lid on the blancher. The water should return to boiling within 1 minute, or you are using too much vegetable for the amount of boiling water. Start counting blanching time as soon as the water returns to a boil. Keep heat high for the time given in the directions for the vegetable you are freezing.

As soon as blanching is complete, vegetables should be cooled quickly and thoroughly to stop the cooking process. To cool, plunge the basket of vegetables immediately into a large quantity of ice cold water. Cooling vegetables should take the same amount of time as blanching. Drain vegetables thoroughly after cooling. Extra moisture can cause a loss of quality when vegetables are frozen.

Containers for freezing

Foods for your freezer must have proper packaging materials to protect their flavor, color, moisture content and nutritive value from the dry climate of the freezer. The selection of containers depends on the type of food to be frozen, personal preference and types that are readily available. Do not freeze fruits and vegetables in containers with a capacity over one-half gallon. Foods in larger containers freeze too slowly to result in a satisfactory product. There are two types of packaging materials for home use: rigid containers and flexible bags or wrappings. Rigid containers made of plastic or glass are suitable for all packs and are especially good for liquid packs. Straight sides on rigid containers make the frozen food much easier to get out. Rigid containers are often reusable and make the stacking of foods in the freezer easier.

If using glass jars, choose wide mouth dual purpose jars made for freezing and canning. These jars have been tempered to withstand extremes in temperatures. Leave head space to allow for expansion of foods during freezing. Covers for rigid containers should fit tightly. If they do not, reinforce the seal with freezer tape. Freezer tape is especially designed to stick at freezing temperatures.

Flexible freezer bags and moisture-vapor resistant wrapping materials such as plastic freezer wrap, freezer paper, and heavy-weight aluminum foil are suitable for dry packed products with little or no liquid. Bags and wraps work well for foods with irregular shapes. Bags can also be used for liquid packs. Press to remove as much air as possible before closing.

This information and more can be found from the Institute of Agriculture and Natural Resources at the University of Nebraska–Lincoln cooperating with the Counties and the United States Department of Agriculture website, http://food.unl.edu.
University of Nebraska–Lincoln Extension educational programs abide with the non-discrimination policies of the University of Nebraska–Lincoln and the United States Department of Agriculture.

Cooking Food: PART 4 – by Chef Bill

Search for the proper cooking temperatures on the FDA’s Food Safety Web site, 24 hours a day at
http://www.cfsan.fda.gov

hamburger-thermometerThese temperatures must be reached and held for a specified amount of time.  Use properly calibrated thermometers to measure the internal temperature of food.  Measure internal temperatures in the thickest part of food and take at least two readings in different locations.  If the food is too thin then stack them on top of each other and check temperature.  This method works well with hamburgers and chicken breast.
Keep your thermometer clean and sanitized.

You should clean and sanitize after each use.  I like to use alcohol wipes because it is quick and easy.   You can purchase several different  brands of  sanitizer or make your own by using one gallon of room temperature water and one cap full of bleach.  Use a separate bucket for sanitizers with a clean towel in it.  After you clean your  counter and equipment dry it with a clean cloth then wipe it down with the sanitizer and let it air dry.  Do not dry it again with a cloth.

Note:  When you cook your food to the proper temperature not only is it safe but moist.  Never over cook your  food again.  I like to check my food temperatures early and often.

Here’s to your healthy kitchen!

Chef Bill

Food Preparation: PART 3 – by Chef Bill

Preparing Foods Safely

foodprepFollow these guide lines when preparing food.  Always use clean and sanitized work areas, cutting boards, knives, and utensils.  Take out of storage only as much product as you can prepare at one time.  Uncooked eggs that are out of the shell should be cooked promptly.  You can store eggs out of the shell in the refrigerator at 41 degrees F or lower for no more than two hours.
Make sure fruits and vegetables do not come into contact with surfaces that have been exposed to raw meat and poultry.  Wash all fruits and vegetables thoroughly under running water before cutting or combining with other ingredients. This includes melons, oranges, etc. that you may be cutting through but not eating.   Bacteria can be pushed into an unwashed fruit or vegetable when being cut with your knife.
Store your canned tuna fish in the refrigerator so when you make your tuna salad it will be at 41 degree F or lower.  Warm tuna will raise the temperature.  Use cold eggs for egg salad.   Use cold chicken for chicken salad.  Use cold ham for ham salad.  It will help keep your protein salads at the proper temperature.
Handling food safely prior to cooking is very important.
While cooking food to the required minimum internal temperature is the only way to kill micro-organisms it does not destroy spores or toxins that micro-organisms create.  Safe handling of the food before it is cooked is essential to preventing micro-organisms from growing and producing  spores and toxins.  The minimum internal temperature at which micro-organisms are destroyed varies depending upon the food.  Minimum internal cooking standards have been developed for most food and will be listed in our next article.

Here’s to your healthy kitchen!

Chef Bill

Food Preparation: PART 2 – by Chef Bill

Preventing Cross-Contamination

Make sure cloths or towels used for wiping spills are not used for any other purpose.

I like to use disposable paper towels.  Make sure you wash your hands between tasks.  Consider using single-use gloves when preparing food.  Wash your hands before putting on gloves.  Gloves should be used only for a specific task and changed each time a new task is started.  If gloves are punctured or ripped that gloves must be changed.  Remember change your gloves.

When I use to do food safety audits I always checked to see how many cases of gloves were purchased monthly to see if they were being used properly.

Thawing Food Properly

Freezing food does not kill all microorganisms but it does slow their growth.  When frozen food is thawed and exposed to the temperature danger zone microorganisms that are present will begin to grow and multiply.

There are only four acceptable ways to thaw food.

I do not recommend thawing your food submerged.

1.    Place your food on a plate in a sanitized sink with the drain open with running,  portable water at a temperature of 70 degrees F or lower.  Water flow must be strong enough to wash loose food particles off into the drain.  Remember to sanitize your sink after your food is thawed.

2.    Place your food or raw meats in a separate area in your refrigerator underneath your ready to eat foods.  The temperature of the refrigerator should be 41 degrees F or lower.

3.     Place food in a microwave oven if the food will be cooked immediately after thawing.  This is my favorite way to thaw frozen foods.  I no longer throw away food left too long in the refrigerator.

4.    Cook frozen food in the oven.  Make sure you cook your food to meet the minimum internal cooking temperature.

Here’s to your healthy kitchen!

Chef Bill

Tip for Fruit That Spoils Too Quickly

Here’s a tip from a reader that works for her…

Berries are delicious, but they’re also kind of delicate and can get that fuzzy mold fairly easily.

Here’s a tip I’m sharing on how to prevent them from getting that in the first place:

Wash them with vinegar.

·      When you get your berries home, prepare a mixture of one part vinegar (white or apple cider probably work best) and ten parts water.
·      Dump the berries into the mixture and swirl around.
·      Drain, rinse if you want (though the mixture is so diluted you can’t taste the vinegar)
·      Pop in the fridge.
·      The vinegar kills any mold spores and other bacteria that might be on the surface of the fruit, and voila! Raspberries will last a week or more, and strawberries go almost two weeks without getting moldy and soft.

You’re so berry welcome!

Food Preparation: PART 1 – by Chef Bill

The two leading factors in food-born illness are temperature abuse and cross-contamination.  The key to serving safe food is to handle food safely.  Spend your time training your family in principles of sanitation time and temperature control.

Following these guidelines will prevent food from being subject to time and temperature abuse.

family assistance, family support, food in the refrigerator, free dinner in Hooksett, free meals in Hooksett, free meals in NH, Hooksett, Hooksett Community Kitchen, Refrigeration tipsHave a bi-metallic stem thermometer available.  You can find it in the kitchen gadget aisle at your local grocery store.

When preparing food take out only as much food from storage as you can prepare at one time.  For example:  if you are breading six chicken breasts and are doing something else at the same time only take out two chicken breasts, bread them and then store them in your refrigerator.  Then do the next two.  Continue breading with the next two.  Cook, hold, cool and reheat food properly.   The idea is to not have six pieces of chicken sitting around unrefrigerated.   I have teenagers who eat at different times due to school and work schedules so when I cook pasta I cook and serve, then put the rest in the refrigerator right a way.  Do not leave it sitting on the counter.  They can always reheat their dinner in the microwave.  Cooling down the foods will be covered in a future article entitled “Leftovers”.

When heating or cooling food, pass it through the middle of the temperature danger zone 70 degrees F to 120 degrees F as quickly as possible.  Microorganisms grow faster in the middle of the range.  Discard food if it spends more than four hours total in the temperature danger zone 41 degrees F to 140 degrees F.  This includes time spent in the temperature danger zone during purchasing, storage, preparation and cooking and then again during cooling and reheating.

Following these guidelines will prevent against cross- contamination.

Prepare raw meats, fish and poultry in separate areas from produce or cooked or ready to eat foods.  If space is not available prepare these items at different times.

Assign specific equipment such as cutting boards, utensils and containers to each type of food product.  For example,  use one set of cutting boards utensils and containers just for poultry and another set for meat and a third set for produce.

Clean and sanitize all work areas, equipment and utensils.

If you have small children at home it is never too early to teach them good food safety skills.  Start out with proper hand washing.  It is a gift that will last a lifetime.

Thank you,

Chef Bill