Preserving That Fall Harvest – Part 2

veggiesThis was a great article from About.com.  These tips can prolong the great vegetables you may have grown or selected from your favorite farm stand.  Many vegetables will keep for months in cold storage, if you can provide the right conditions. Choose your vegetables well, keep an eye on them through out the winter and don’t be shy about using them. They won’t last forever.

General Storage Rules

Store only fully mature vegetables. Immature fruits and vegetables will rot quickly. Hold off harvesting as long as possible, especially with root vegetables, that can withstand some frost.

Do not store vegetables that have been bruised or nicked or that show the slightest sign of rot. Be careful when handling them.

Remove all excess soil. Don’t wash the vegetables, just let them dry and brush off the soil. You can wash them well before using them.

Thoroughly clean your storage area before each use.

Keep the storage area dark.

Do not expose stored vegetables to temperatures below freezing.

Check on your stored vegetables every week or two. Storage times are just approximations, since vegetables, temperatures and conditions can vary widely.

Use vegetables taken from cold storage as soon as possible. They will not last as long as they would if they had been freshly picked.

Dry vegetables (winter squash, pumpkins, onions, garlic) require less effort to store, but they need more space. Since indoor humidity is generally low during the winter, make use of any unused, dark spaces and corners. These vegetables store best if they are kept up off the floor and are not allowed to touch each other. If you must pile things on top of each other, you will need to check them more frequently.

Moist vegetables (potatoes, root crops, cabbages) should be stored in a container, rather than exposed to air. Traditional methods include storing them in peat, sand, sawdust or newspaper, but you can also use plastic bags or cardboard. If you choose to use plastic, make sure there are a few holes, for excess moisture to escape. To contain the odor of stored cabbages, you can wrap them in a couple of sheets of newspaper first.

An easy way to store these is to fill a cardboard box with about 4 in. of sawdust or other insulating material. Lay a single layer of vegetables on top of that. Do not let the vegetables overlap and keep them about 4 in. from the sides of the box. Add another 2 –3 in. layer of insulating material and another layer of vegetables. Continue layering until the box is almost full. Finish with a 4 in. layer of insulation. If you are worried the temperature will get too cold in your storage area, increase the top, bottom and side insulation to 6 – 8 in. or slip the first box into a larger box, with additional insulation. Since these boxes can be large, using a light insulating material will make them easier to lift and move around.

Root vegetables can be prone to shriveling. Storing them in slightly damp sphagnum moss or plastic bags with a few holes punched in them will help hold in moisture.

You can keep carrots and parsnips in the ground all winter, but you won’t be able to harvest them once the ground freezes.

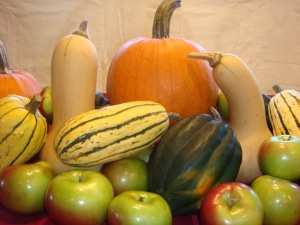
Winter Squash and Pumpkins – Make sure these are fully ripened, with a rind hard enough to resist being dented with your nail. Leave a couple of inches of stem intact and do not use it as a handle, or you could injure the squash. Allow to cure in a warm, dry, well ventilated spot for about 10 – 14 days, then store in a cool, dark, dry spot where you can spread them out and keep them separate. (Note: acorn squash stores better if not cured before hand.)

For the full article by gardening expert Marie Iannotti, visit http://gardening.about.com/od/vegetable1/a/Storing-Vegetables-For-Winter.htm.

Preserving That Fall Harvest – Part 1

During the fall season, harvesting crops and preserving them is top of mind for many. There are many methods for preserving, but one of the easiest is freezing.  While freezing is not best for ever type of produce, freezing is an excellent way to preserve vegetables, is easy, and only requires a freezer that maintains a temperature of 0 degrees F or lower.

Blanching

Blanching (scalding vegetables in boiling water for a short time) is a must for almost all vegetables to be frozen. It stops enzyme actions which can cause loss of flavor, color and texture.

Blanching cleans the surface from dirt and organisms, brightens the color and prevents loss of vitamins. It softens vegetables and makes them easier to pack. Blanching time is crucial and varies with the vegetable and size. Under blanching stimulates the activity of enzymes and is worse than no blanching. Over blanching causes loss of flavor, color, vitamins and minerals.

For home freezing, the most satisfactory way to heat all vegetables is in boiling water. Use a blancher which has a blanching basket and cover, or fit a wire basket or large strainer into a large pot with a lid. Use one gallon water per pound of prepared vegetables. Put the vegetable in a blanching basket and lower into vigorously boiling water. Place a lid on the blancher. The water should return to boiling within 1 minute, or you are using too much vegetable for the amount of boiling water. Start counting blanching time as soon as the water returns to a boil. Keep heat high for the time given in the directions for the vegetable you are freezing.

As soon as blanching is complete, vegetables should be cooled quickly and thoroughly to stop the cooking process. To cool, plunge the basket of vegetables immediately into a large quantity of ice cold water. Cooling vegetables should take the same amount of time as blanching. Drain vegetables thoroughly after cooling. Extra moisture can cause a loss of quality when vegetables are frozen.

Containers for freezing

Foods for your freezer must have proper packaging materials to protect their flavor, color, moisture content and nutritive value from the dry climate of the freezer. The selection of containers depends on the type of food to be frozen, personal preference and types that are readily available. Do not freeze fruits and vegetables in containers with a capacity over one-half gallon. Foods in larger containers freeze too slowly to result in a satisfactory product. There are two types of packaging materials for home use: rigid containers and flexible bags or wrappings. Rigid containers made of plastic or glass are suitable for all packs and are especially good for liquid packs. Straight sides on rigid containers make the frozen food much easier to get out. Rigid containers are often reusable and make the stacking of foods in the freezer easier.

If using glass jars, choose wide mouth dual purpose jars made for freezing and canning. These jars have been tempered to withstand extremes in temperatures. Leave head space to allow for expansion of foods during freezing. Covers for rigid containers should fit tightly. If they do not, reinforce the seal with freezer tape. Freezer tape is especially designed to stick at freezing temperatures.

Flexible freezer bags and moisture-vapor resistant wrapping materials such as plastic freezer wrap, freezer paper, and heavy-weight aluminum foil are suitable for dry packed products with little or no liquid. Bags and wraps work well for foods with irregular shapes. Bags can also be used for liquid packs. Press to remove as much air as possible before closing.

This information and more can be found from the Institute of Agriculture and Natural Resources at the University of Nebraska–Lincoln cooperating with the Counties and the United States Department of Agriculture website, http://food.unl.edu.
University of Nebraska–Lincoln Extension educational programs abide with the non-discrimination policies of the University of Nebraska–Lincoln and the United States Department of Agriculture.

Fighting Cancer with Food – by David Haas

We received a wonderful article from David Haas of the Mesothelioma Cancer Alliance. Good nutrition is important for everyone, but even more so when your body is recovering or battling a serious illness.  Thank you David for sharing this great information.

(always check with your doctor if you have limitations or concerns with your dietary needs or interference with medications you are taking)


Fighting Cancer with Food


Good nutrition during cancer treatments not only helps you feel better but can also aid your body fighting off infection and getting stronger. While food cannot necessarily heal cancer, it certainly allows the body to function better and more comfortably.


Chemotherapy Can Cause Anemia, Bruising and Bleeding

Unpleasant side effects, such as anemia, which is due to insufficient iron levels in the blood, or bruising and bleeding, are commonly experienced during chemotherapy. These conditions are caused by a low platelet count in the blood. Your diet can help to reduce and possibly eliminate some of these side effects.

Be sure that your diet is rich in iron. Iron is found in many foods, including red meat, liver, eggs and fish. Leafy green vegetables, such as kale, spinach, collard greens and mustard greens, are another excellent source of iron.

• Whole grain products, including breads, cereals, pastas and rice, are often fortified with added iron. Look on the label to be sure that the particular food contains at least 20 percent of the recommended daily allowance (RDA) for iron.

• Eat more pineapple. Pineapple contains a natural enzyme called bromelain, which can actually help to dissolve blot clots and cause bruises to fade.

• Calcium prevents iron absorption in the body. Therefore, do not take an iron supplement when eating foods rich in calcium. Likewise, do not take a calcium supplement when eating iron-rich foods.


Radiation May Cause Mouth Soreness or Ulcers

Radiation is designed to attack and destroy rapidly growing cancer cells. The downside is that it can also destroy healthy cells, causing damage and pain in the mouth.

• Avoid spicy and acidic foods. Foods with a higher acid content, such as vinegar, citrus fruits and sugary foods should be limited as they can irritate the inside of the mouth.

• Stay away from extremely crunchy foods or those with sharp edges, such as chips, crackers and pretzels. Eat softer foods or those that can be broken into smaller pieces.

• Consume plenty of liquids, but try using a straw, as this may keep the liquids away from any sores in your mouth.


Chemotherapy Often Causes Vomiting

Various cancer treatments, chemotherapy in particular, dehydrates the body, which can lead to frequent vomiting.

• It is important to stay well hydrated with nourishing beverages, such as water, milk, juice and broth.

• Eat several smaller meals throughout the day instead of consuming three large ones. Think in terms of smaller breakfasts, lunches and dinners with snacks in between.

• Take time to thoroughly chew your food, thus beginning the process of digestion in your mouth and reducing the overall load placed on the stomach.

• Sit upright in a chair while eating. Reclining while eating or lying down soon after a meal may cause indigestion or heartburn by allowing some of the gastric juices from the stomach to leak up into the esophagus. This is not only uncomfortable but can also induce painful vomiting, due to the high acid content.

• Refrain from any strenuous activity for at least an hour after a meal. This will allow the stomach to fully digest your meals, lessening the likelihood of vomiting.

• Avoid potent smells. Anything that makes you feel nauseated, such as an unpleasant smell, can trigger vomiting. Try to notice and avoid your triggers.

The foods that you eat and do not eat can greatly aid in abating the side effects of cancer treatment. Try keeping a journal of what foods help or hinder your comfort in your battle against cancer. Inform family members as well so they can be mindful when preparing meals for you.

Mesothelioma Cancer Alliance